Install Procedure
<< First [Prev] [Next] Last >> 1 2 3 ..4
Do not postpone or stretch out the installation procedure or you'll forget what goes where. Here are some important points about assembly:- Make an assembly plan depending on what you removed from the engine. Work your way from inside-out, from bottom-up, don't forget any gaskets or bolts.
- Clean all mating surfaces separated by a gasket to ensure nothing will leak after assembly (I used brakeclean).
- Parts that need to be fastened to the engine's aluminum body should be tighten in two passes (don't strip any treads).
- Use a broken-in torque wrench to torque everything to its specification (don't strip any treads).
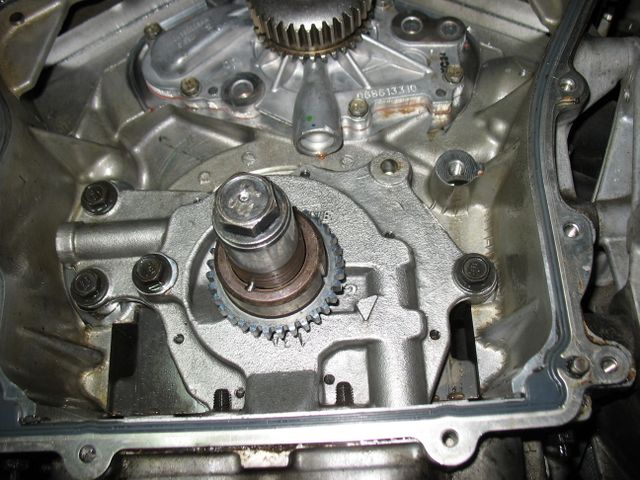
Install Oil Pump
If you removed it, reinstall oil pump with pickup tube. The pump gear is keyed to the crankshaft, just put it on and tighten it. Install the oilpan last.
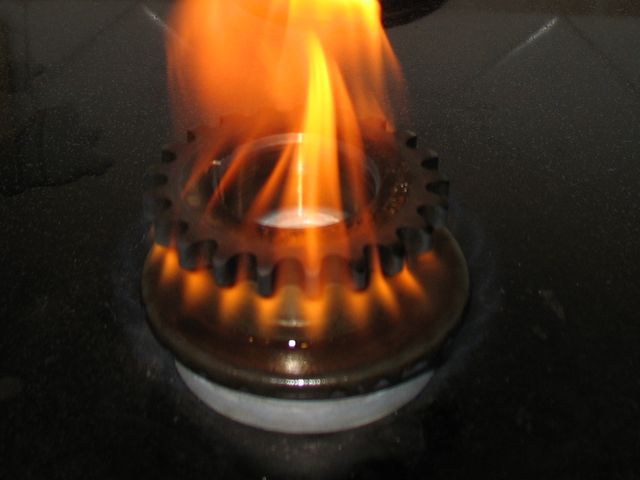
Install Crankshaft Sprocket
The sprocked is mounted with a special tool or by expanding it with heat. Wipe off the assembly lube from the sprocket and heat the sprocket on your stovetop. You want gradual heating for about 2 minutes on low heat. Do a dry run from your kitchen to the garage to practice installing the sprocket because you'll have about 20 seconds to install it. Remember not to put it in backwards! Push it on "all the way", which is 39.05mm from the end of the crankshaft. Once set, make sure the crankshaft is at 60 TDC when you're done. Let it cool.Click images to enlarge
Install Water Pump
The water pump doesn't require any RTV, simply put it on the block
with the provided gasket and screw it in top to bottom.
Install Small Chain Guides and Liners
Install the small left and right chain guides and liners. Install the right (straight) large guide and losely position the left guide.
Install Tensioner
Set the tensioner and place it in left cylinder head and push it against the large guide arm. Secure and tighten the tensioner cover. Be sure not to reset it prematurely.
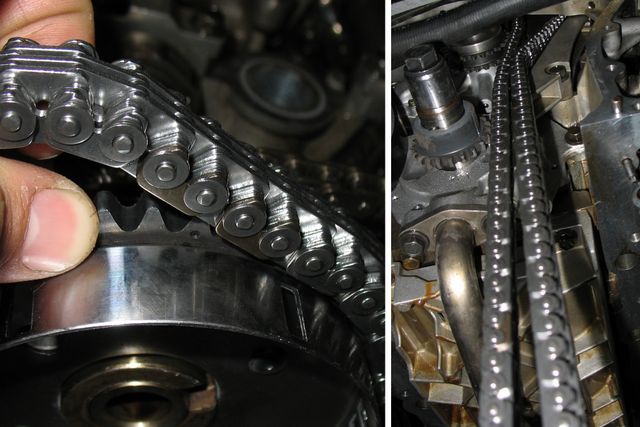
Install and Align Timing Chain
Alignment entails two parts. First, position and align the chain on the crankshaft and camshaft sprockets. Second, turn the camshafts so that they align with the camshaft sprockets.
-
Start by positioning the chain on the right camshaft sprocket and align the timing mark (the dimple at the base of the cog) so that it's between the two plates on timing chain. Let the rest of the chain hang down, lift it up and lower it between the right pair of guides into the engine. Put the sprocket on the right cam, no need to bolt it yet.
-
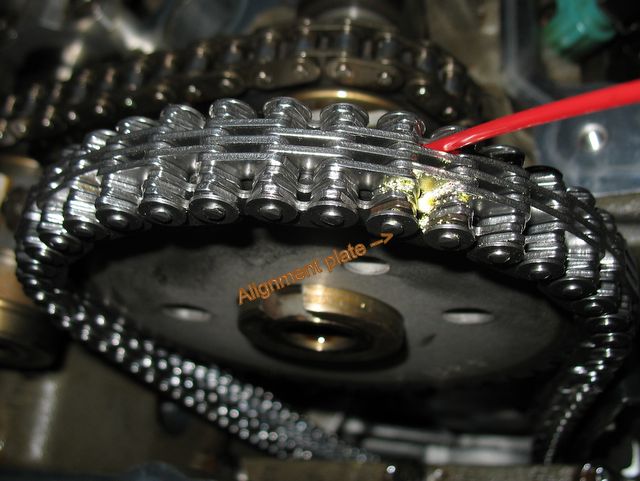
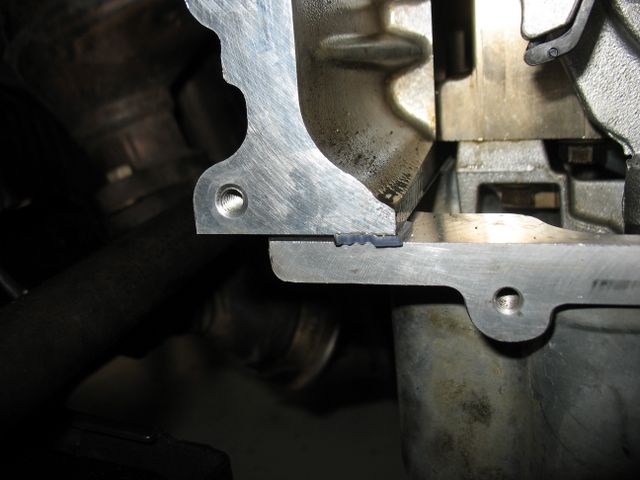
Route the chain around the crankshaft sprocket and align the chain so that the following align: the arrow on the oil pump, the marking plate and the groove in the sprocket body.
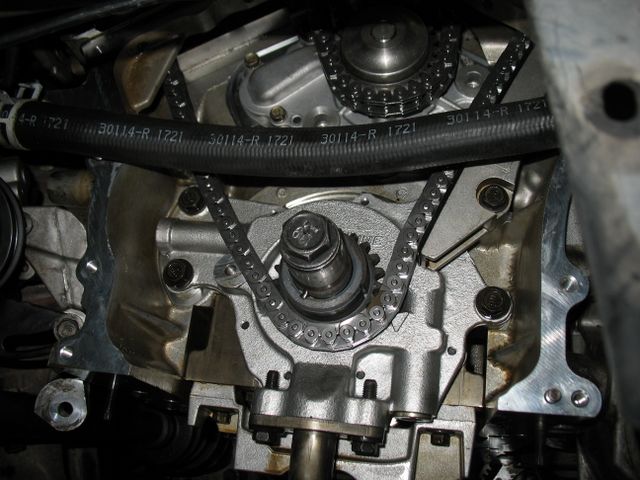
- Route the chain around the water pump then pull it up through the left set of guides and put the left camshaft sprocket on the chain.
-
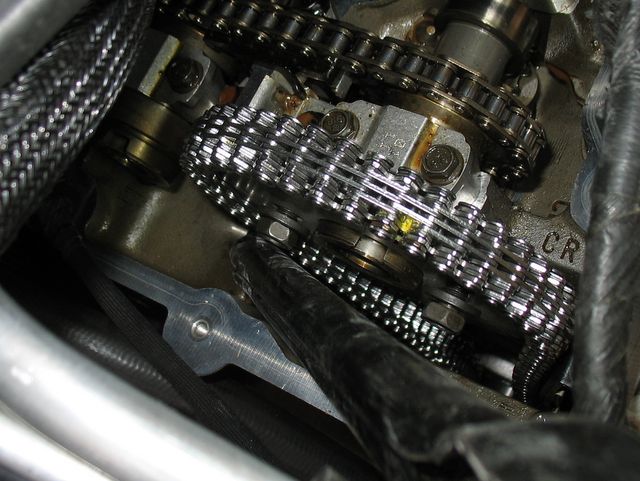
Align the single plate on the chain to the timing mark on the left sprocket and let it float on the cam.
I used some chalk and straw to make the mark more visible from both sides of the chain.
- At this point, the chain should be close to the final position.
-
Refer to the video you recorded when you loosened the camshaft sprockets and the
valve springs turned the cams. You'll need to now turn them in the opposite direction.
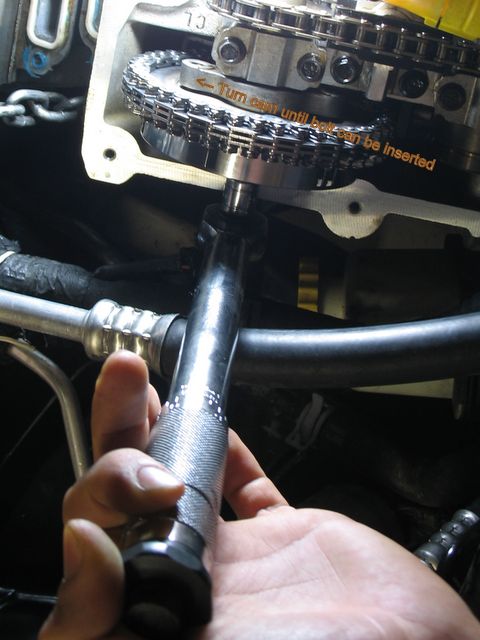
Put a square 3/8" wrench into the right cam and get a feel of the tension in the valve springs by slowly and lightly turning the cams a small amount in each direction. Turn the shaft until the holes in the sprockets line up with the treads in the camshaft head. Insert the cam bolt through the camshaft sprocket and tighten into the camshaft head. The crankshaft sprocket, via the chain, will help keep the right half of the chain under tension.
- Repeat for the left cam as well.
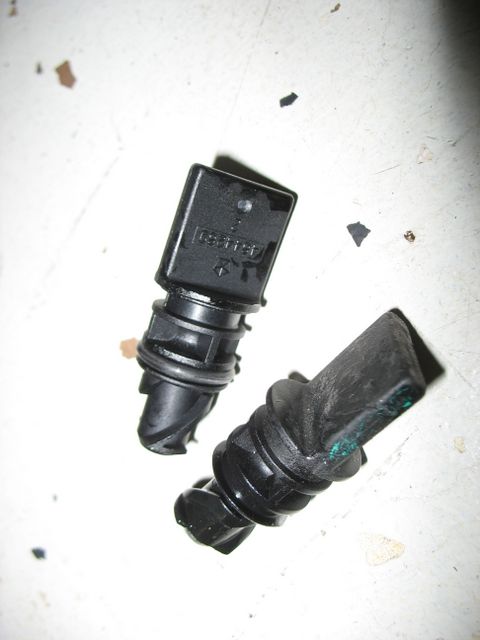
- Install the camshaft sensor.
- Use a wrench on crankshaft bolt and turn the engine a couple of times to verify that everything is proper.
Release the Tensioner!
Use a long tool to push the large left chain guide against the timing tensioner. Similar to a push-pen, it will reset and apply tension to the chain.
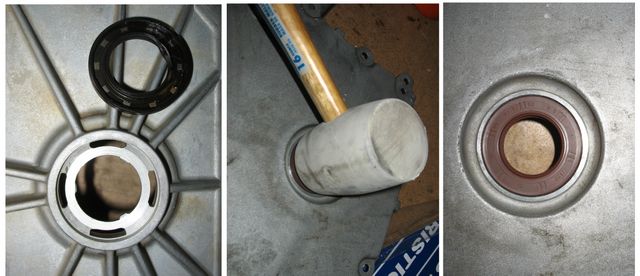
Replace Timing Cover Front Oil Seal
Pry out the old seal with a screwdriver and gently press in the new gasket.
Install Oil Pan
The The oil pan goes back on a little easier than it came out. Put on the new pan gasked and install the pan on the engine block. If you removed them, replace the crossover pipe and structural cover.
Replace Water Outlet
This part sits at the front of the engine between the two valve covers. If it shows any signs of a leak then it's a good idea to replace it now.
Replace Spark Plugs
With the pan installed, put the jack back under the pan. Before you lift the engine into position to attach it to the right engine mount, take the opportunity to
easily access left bank spark plugs and valve cover. Make a long socket extension out of two smaller ones by snapping them together inside the plug port. Drop one
extension first, then the second.
Caution! Once you remove the spark plug make sure you don't drop anything inside the cylinder! Practice on the right cylinder first.
Install Timing Cover
Put a small amount of RTV at the bottom of the engine block where the oil pan meets the block near the cover area. Position the timing cover gasket over the engine block. Slide the cover up into position and tighten it using one of the cover to block bolts.
Replace Valve Covers
Install new gaskets on the valve covers and put them back on the cylinder heads. I used some masking tape to keep the gaskets from falling out in the process, then removed them.
Replace Intake
Replace intake gaskets
and replace the intake on the engine. Insert the EGR valve ports into the intake. Connect all hoses and fittings. Replace throttle body. Replace air box, air filter and connecting arm to the throttle body.
EGR connection reference.
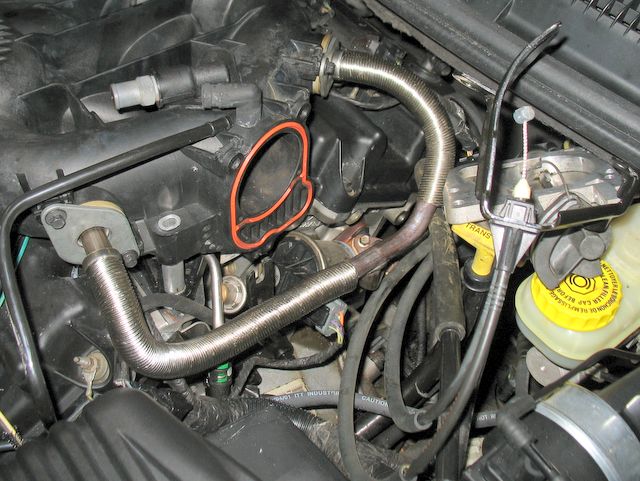
EGR connection reference.
Replace the Cooling System
Replace all hoses and radiator draincock. Install the coolant pressure container and re-connect all hoses. Open the water outlet drain valve and add coolant. If the engine has been completely drained then about 9.5qt of Dexcool will be required. Still air will be trapped in the engine and will slowly escape making room for more coolant. Top off coolant as needed.
Install Crankshaft Pulley
Install Crankshaft Pulley, A/C, serpentine belt and alternator belt. I used the spacer and gear from a ratcheting wrench to screw the pulley back in. The gear is made of two parts separated by ball bearings.

Install Accessories and Belts
Install A/C, serpentine belt and alternator belt.
<< First [Prev] [Next] Last >> 1 2 3 ..4