Chrysler 2.7 Timing Chain and Water Pump Replacement -- Teardown and removal of old chain
<< First [Prev] [Next] Last >> 1 2 ..3.. 4
Inspect Timing Chain
If needed, look for any obvious problems or damage to the chain. In my case, the water pump gear was completely loose in its track, as if its bearings fell out.
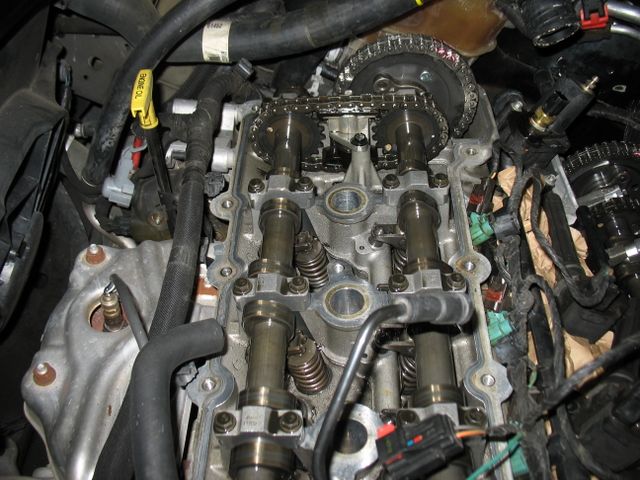
Take pictures of the lower sprocket, top sprockets and timing chain tensioner from multiple angles. Try to do this without flash so that the photo has better perspective. Mark the cam sprockets' position (shown with purple chalk below) because the next step is going to loosen them. The camshafts' lobes are under load of the valve springs. Once the camshafts are loose they are going to rotate until the spring load of the intake and exhaust valves balance out. When you put the chain back, you'll have to rotate and tension these springs back into the original position.Click images to enlarge
Remove Timing Chain
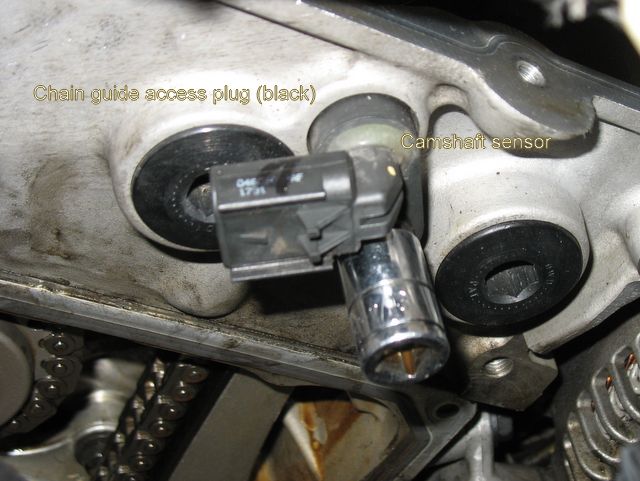
Remove camshaft sensor.
Unfasten the nuts from the right cam sprocket. Move the sprocket off the cam shaft. Remove the chain by unwrapping it from the water pump and lower sprocket.
Remove Timing Chain Guides
Use the 12mm L-shaped wrench to remove the black access plugs so you can remove the guide bolts.
Remove the Water Pump
Break loose all water pump retaining bolts in one pass then unscrew them from the cylinder block
in a second pass. Inspect the pump sprocket for play and missing bearings.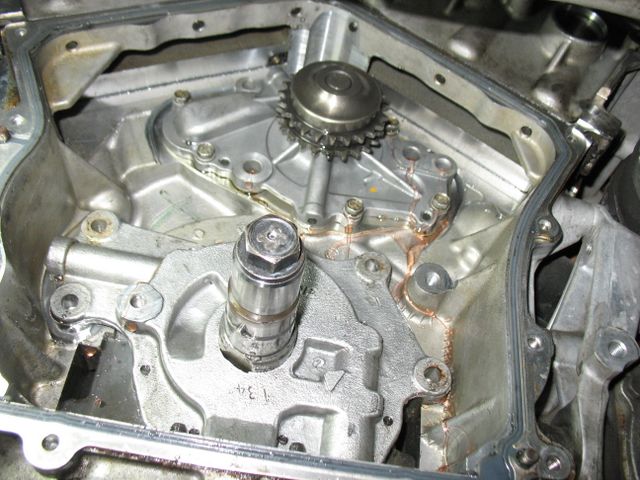
Remove Crankshaft Sprocket
If the sprocket is worn or if the chain stretched then you should replace the sprocket. First take a convenient measurement with a micrometer caliper and write it down, i.e. from top of sprocket to first groove in the crankshaft. Thoroughly clean the crankshaft end and use a three-claw puller to pull the sprocket out. Take your time aligning the puller to ensure even grip on the sprocket. Initially you'll be putting on a lot of stress on the sprocket, so pause every so often to allow the sprocket to move.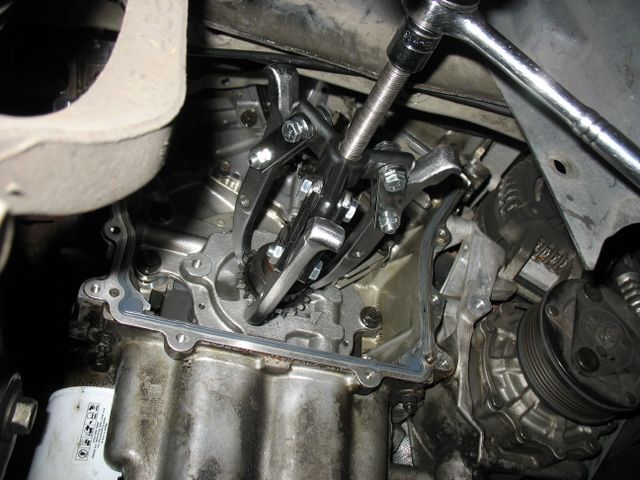
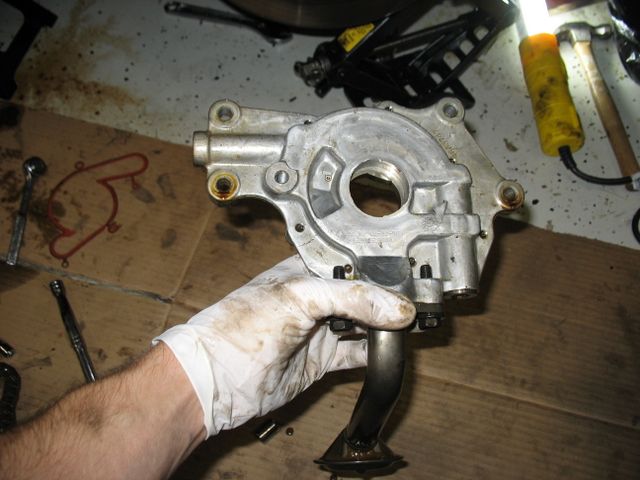
(Optional) Remove the Oil Pump
With the crankshaft sprocket removed, break loose all the pump bolts then unscrew them. The pump slides out easily.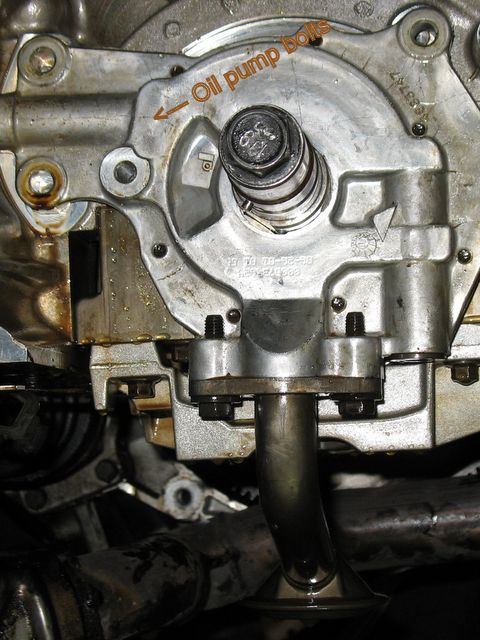
(Optional) Remove oil pan
Remove the structural cover and torque converter housing cover. Drain oil and remove oil filter. Remove the pan-to-timing cover bolts and all pan bolts, about 15 of them. The hardest ones are those close to the exhaust pipe. The FSM says you need to remove the exhaust manifold cross-under pipe in order to remove the pan. However because I couldn't reach the right catalytic converter's bolts, I only loosened the pipe bolts to give the pan some room to wiggle out. If you're doing the same, be sure you don't damage the oil pick-up tube or dent the pan's mating surface in the process. I was able to wiggle it out in the direction of the right headlight.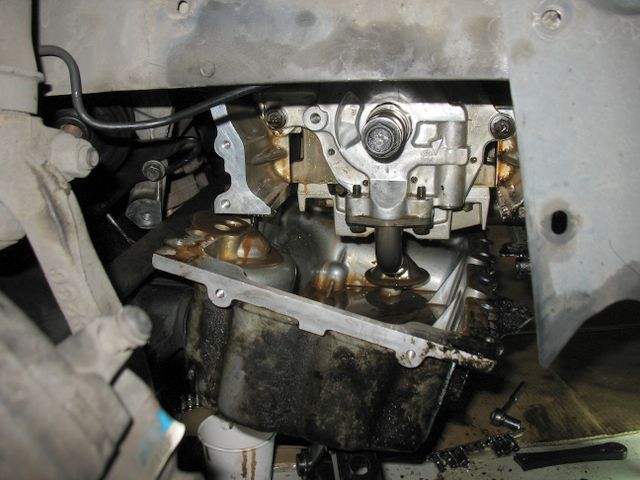
Wash the pan
If oil is dripping on the floor off the windage tray (the part
above the pan) then use a towel to wipe and drain; this will help with installing the pan because you don't want any oil between the pan and engine block.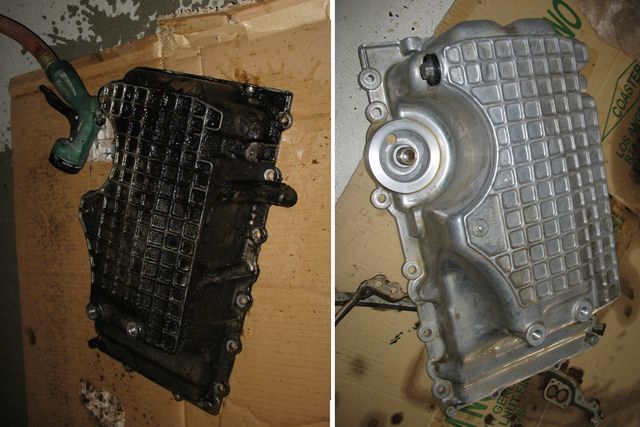
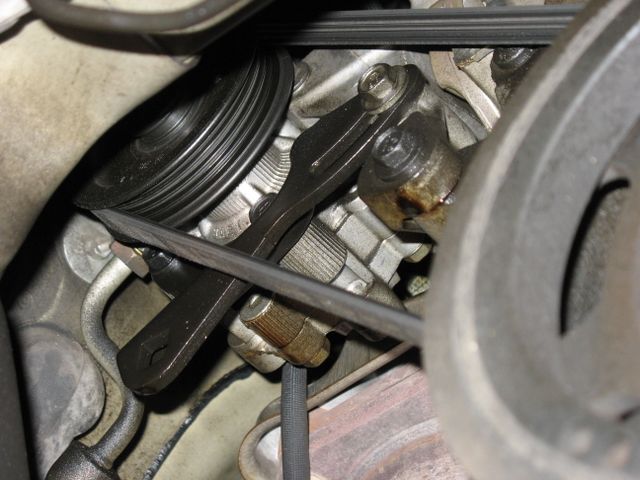
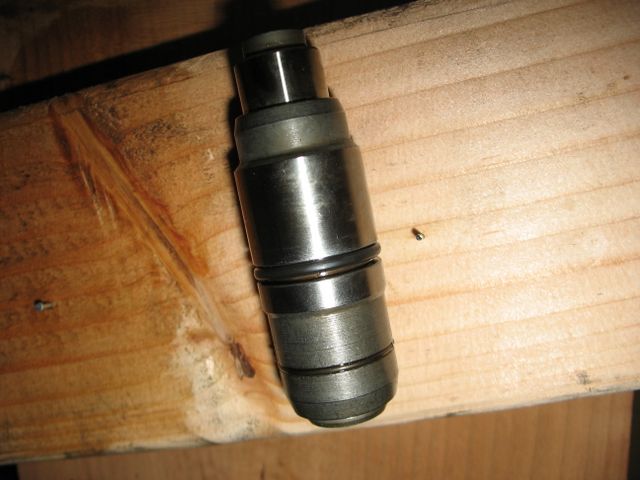
Remove and Purge The Tensioner
About the tensioner: Through the life of the car the timing chain, sprockets and nylon guides wear our. This increases the risk that the chain may jump several teeth of a sprocket. To avoid this the tensioner keeps a constant pressure on the chain assembly to keep it taut.Use an extension wrench and unscrew the the three bolts from the power steering pump. Reposition the pump so you can access the timing tensioner cover.

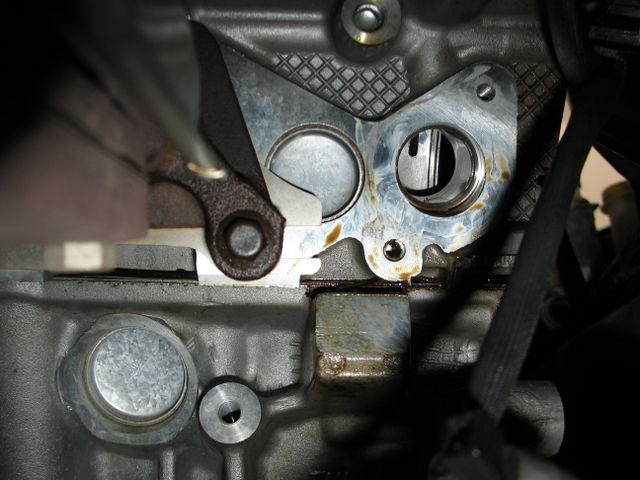
Removal
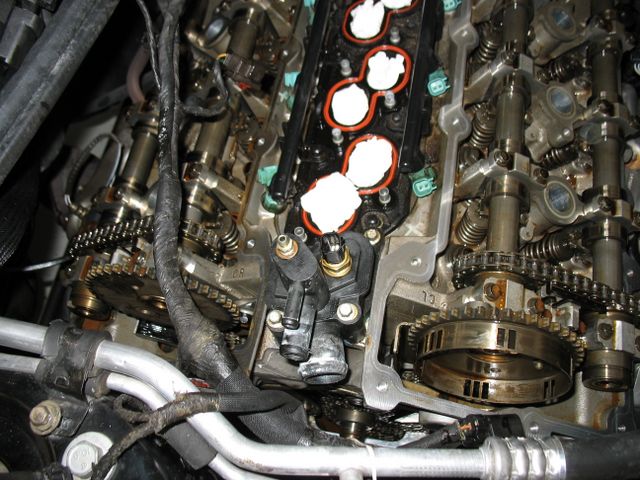
With the pump out of the way, remove the two bolts and take the tensioner out.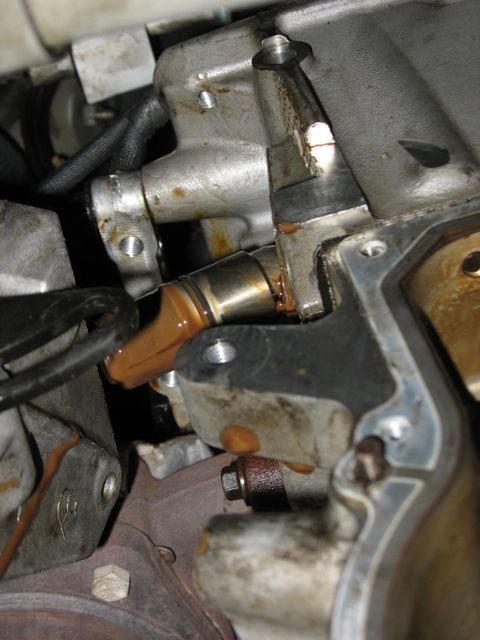
The back of the left chain guide can be seen through the tensioner port.
Purging
If the tensioner is from a 2001 2.7 engine then you're advised to replace it with a new one from the dealer. Purging involves collapsing the tensioner shut, squeezing all the oil out of it and resetting it to the initial position.
If purging a later model tensioner you'll need Chrysler tool 8186. However, I managed to purge it by pressing it against a brad nail
head. Select a nail that closely matches the inner diameter of the check ball shaft so that it pushes the ball down and doesn't get wedged between the ball and the shaft. The reset action is similar to that of a ball point push pen. Squeeze it once and it resets (locks in the short position), squeeze it again and it activates and applies tension to the guide and chain.
<< First [Prev] [Next] Last >> 1 2 ..3.. 4