Chrysler 2.7 Timing Chain and Water Pump Replacement -- Inspection
<< First [Prev] [Next] Last >> 1 ..2.. 3 4
Working Area
The key to this job is making a plan and executing if fast.
So park the car close to electrical outlets and a water hose. Also get a large trashcan (don't empty it until a while after completion). In the first stage start by tearing down enough of the engine to see the condition of the timing system.
Notes and Manuals
Keep this guide handy, print the relevant FSM pages and buy the Chilton's manual if you like. The Chilton's is too concise and brief for me, it gave me no clue when I started the work but it served as a good second opinion as I went along.Engine Orientation
According to the FSM, the front of the engine is at the passenger side and the rear is on the driver's side. From that perspective, the front cylinder head is the right-side one and the rear one under the windshield is the left-side one. However, the clockwise/counterclockwise cam turning instructions are given from the rear of the engine looking towards the front. This is confusing but I'll underscore this part through this guide as needed.
Disassembly
For this job I went from the wheel side and didn't disassemble the front at all.
There are 7 groups of parts that need to be removed:
- lower apron and accessories
- cooling container and attachments
- air intake and throttle body
- upper intake manifold and valve cover
- timing cover, chain, pump(s) and cams
- optionally if you suspect it for leaks -- the oil pan
- optionally if you want to keep going -- the oil pump
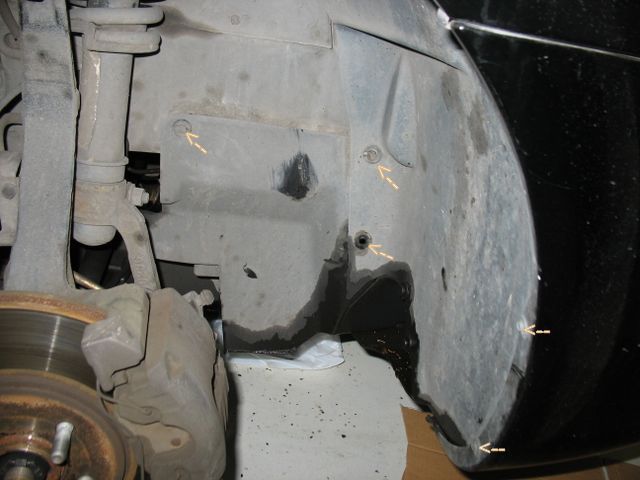
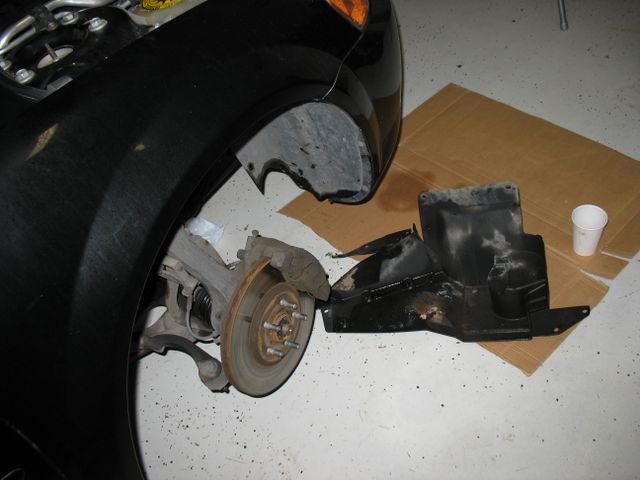
Lower apron
Remove the passenger side wheel and put it away, screw the lugnuts back on the hub. Pry out the apron plastic fasteners and remove the apron to get access to the accessory belt tensioners and pulleys. If you want, wash the apron of any grime and oil and put it in a large trashbag. Start the car and inspect the crankshaft pulley for play or bends.
Click images to enlarge
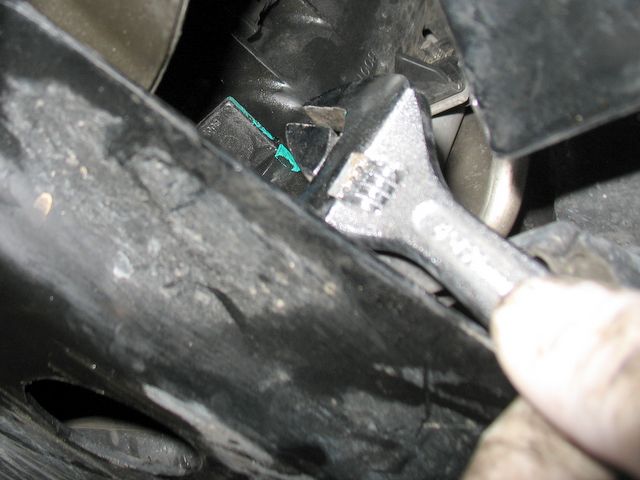
Drain and remove the coolant system
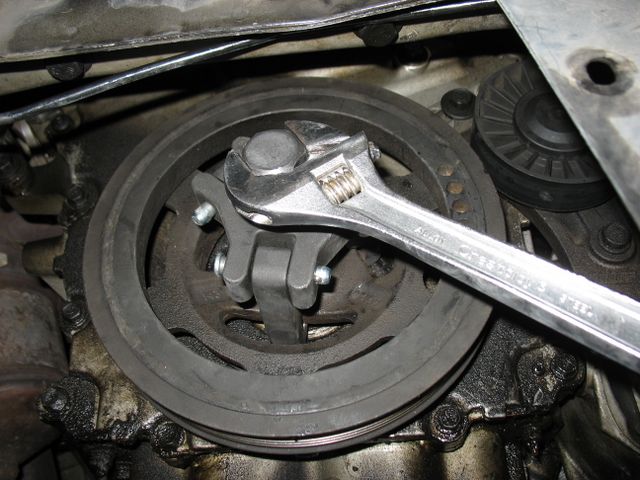
Getting to the draincock is a little tricky and requires some improvization with the tools you have. Here I opened an adjustable wrench about 4mm and used it to turn the draincock. After the coolant drains completely, use a 22 socket to turn the camshaft pulley clockwise several times to pump out as much of the remaining coolant as possible. The coolant has to be drained if you're going to replace the hoses; the second time I did this job I "drained" the cooling system by simply removing the water pump and letting it drain into the oil pan.
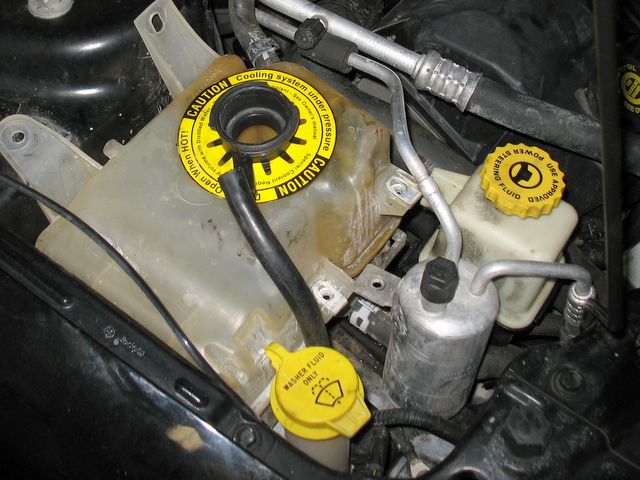
Coolant fill container
Insert a few towels under the connecting hoses, pinch the clamps and slowly pull them out. You need to remove the top end of the hose to get access to the timing cams, but as mentioned above you may not need to remove the cooling container altogether. But you if are going to do it, you'll need to first unscrew the power fluid container bracket to make room.
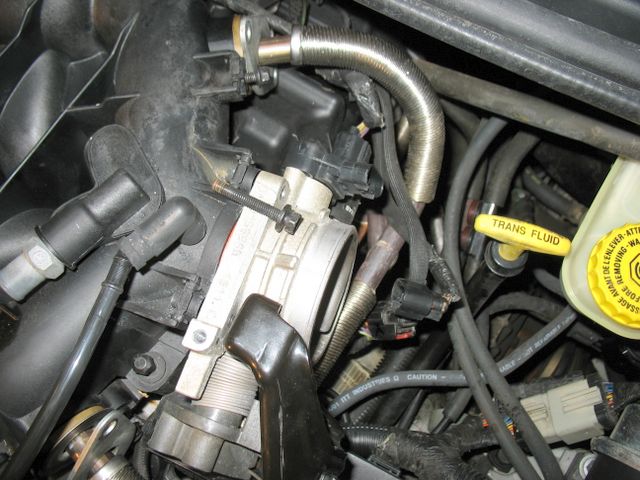
Air Intake
You'll be pulling several hoses apart, so use a sharpie to number their ends with matching numbers. Unplug all hoses going to the intake tube and throttle body. Make note of the TB's position and the operation of the throttle cables before you remove it.
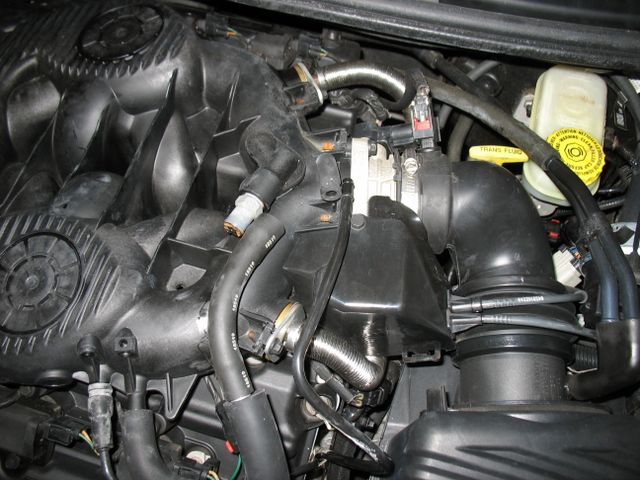
Upper intake manifold
The FSM says that you have to bleed the fuel system before this step, but I found that it's not necessary unless you remove the lower intake manifold as well. Use a deep 10mm socket to first break loose the main bolts in one round and then remove them completely in a second round. Unscrew the long bolt pinning the intake to the cylinder head and unscrew the throttle body from intake. Loosen the EGR tubing. Remove the intake and stuff the fuel ports with something that doesn't shred or holds dirt.
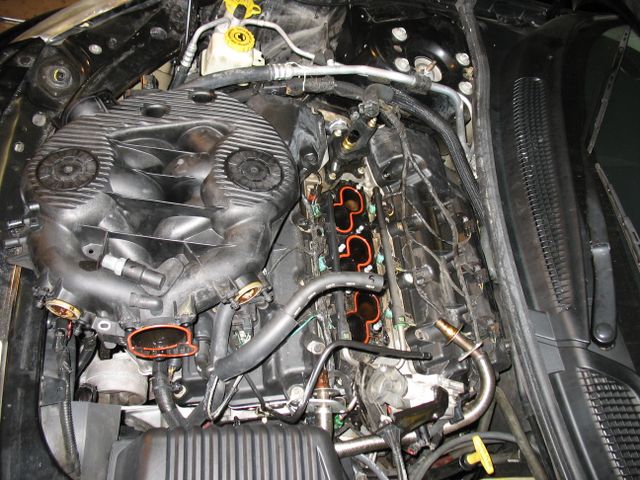
Right valve cover
Start with the right head. Remove the sparkplug wires and reposition the wiring harness so that the cover is unobstructed. Unscrew the cover bolts in alternating fashion. If the cover is stuck, pry it out gently with a plastic tool.
Inspect the camshaft, cam, guides, chains and the top of the cylinder head. Do you want to continue the job or back out? Now's a good time to decide. You can decide again after inspecting the water pump.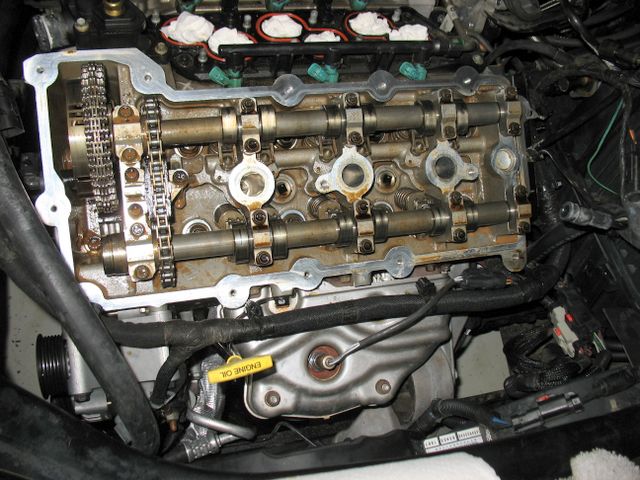
Left (rear) valve cover
Replace the right valve cover to avoid accidentally dirtying or damaging the right head. Secure it with a couple of bolts.
Removing/replacing the left valve cover is nearly impossible without lowering the engine. This in turn requires removing the right engine mount bolts.
Lower the Engine
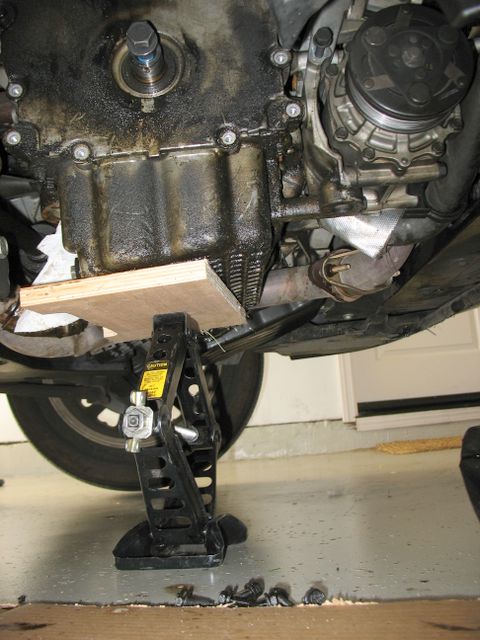
Once you lower the engine you won't be able to move the car until you finish the repairs so make sure it's in a good position. Before proceeding, measure the floor clearence of the engine for reference. To lower the engine, place an adequately sized piece of plywood under the center of the oil pan and setup a mechanical jack under the engine. Slowly tighten it up to ensure proper support of the engine. The engine weighs about 400 lb.
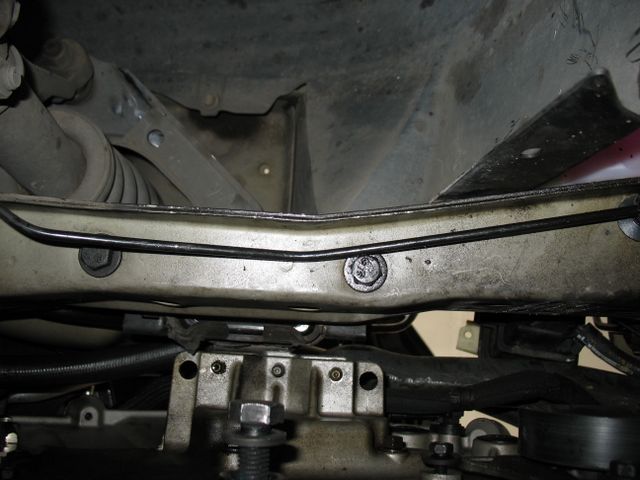
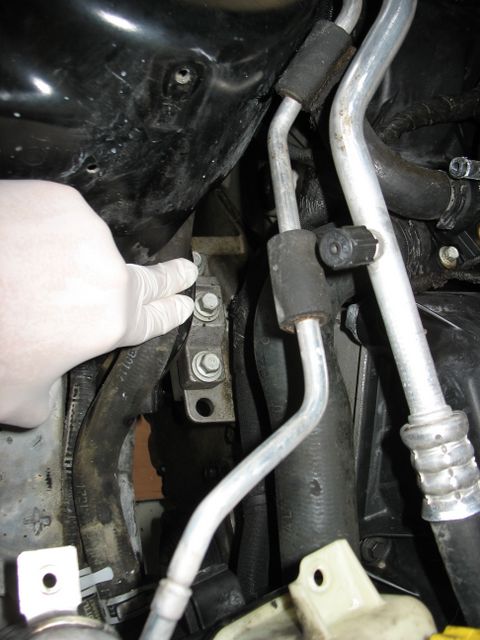
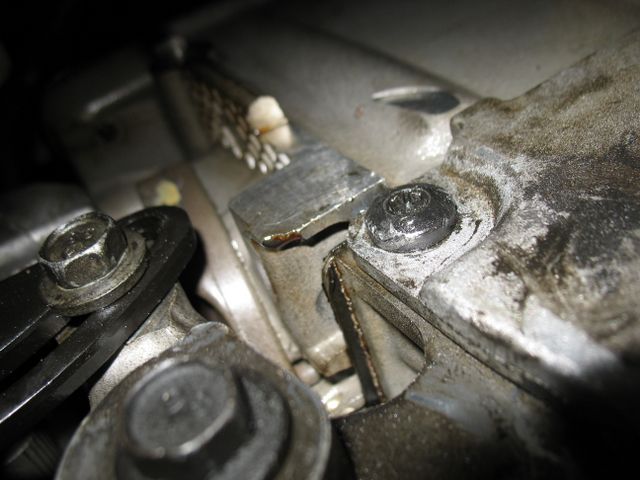
Lift the engine up about 1". This will take the weight off the mount bolts. Unscrew, remove and label the mount-to-timing cover bolts. Unscrew the
two bottom mount-to-frame bolts. Lower the engine about 2-3" inches, for a total drop of about 1-2" inches. This should provide enough clearence to easily remove the left cover.
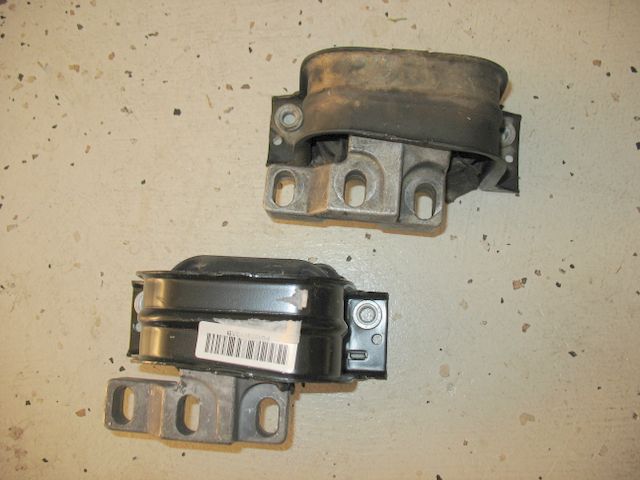
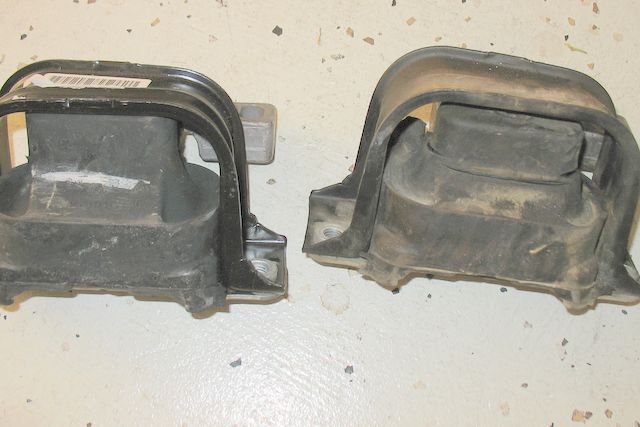
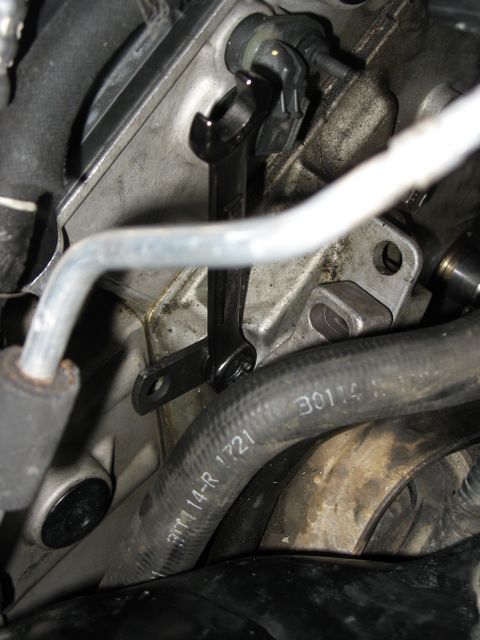
Inspect the engine mount and replace if needed. Notice the three tears in the mount on the right.
With the engine lowered, remove the sparkplug ports, ground wires and valve cover bolts. Remove the valve cover. Inspect the cam, guides and chains for excessive damage and sludge. Compare with the right cylinder head.
Ready to continue?

Do not lift the engine until you replace the sparkplugs and left valve cover back.
Remove the Accessories
First, spray some penetrating oil on the crankshaft pulley 22mm bolt so it can soak for the
next step. Unscrew the serpentine tensioner upper then lower bolts, label and
store them. The FSM says the AC needs to be moved too, but I didn't need to do
it. Remove the serpentine belt tensioner and inspect for any play. You may want to replace the tensioner "puck." Remove the accessory belts, inspect for unusual wear but replace them nonetheless. 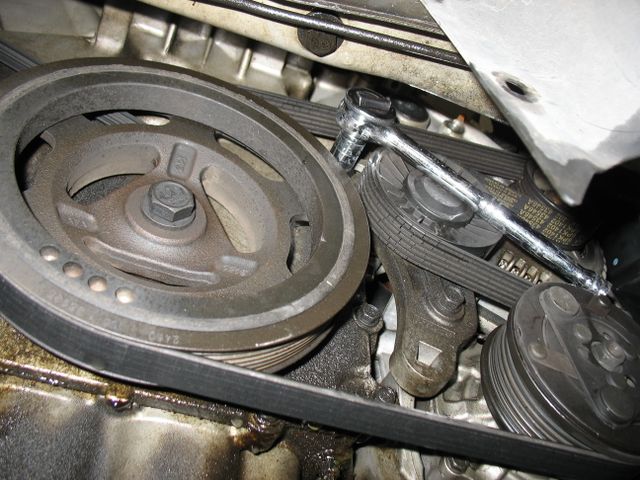
Remove the Crankshaft Pulley
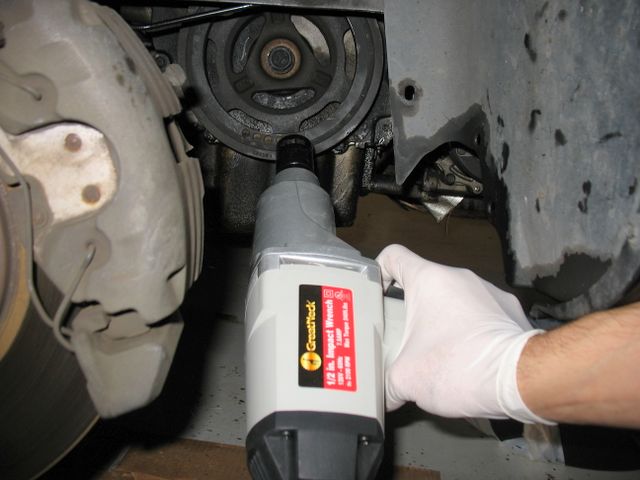
If you didn't spray the pulley bolt, spray it now and give it some time. The bolt is coated with some Blue thread-locker, so it's pretty tight. Use an impact wrench to break loose the bolt. Do not substitute any other tool for this, stripping or breaking the bolt and have some of it get stuck in the crankshaft would be very unpleasant. Take a look at the pulley from the side and note its clearance from the timing cover.
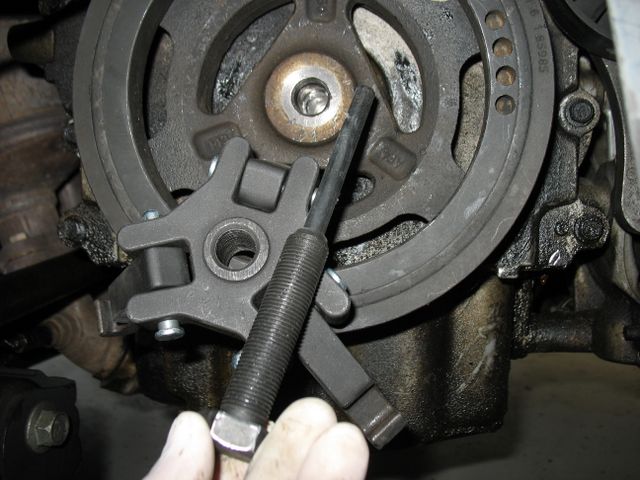
Use Chrysler part OEM-27139 from Autozone to pull the pulley out. Make sure each of the three claws are pulling equally; you may have to reposition the puller a few times. After you remove it lay the pulley flat on the edge of a table to check for bends. Light a flashlight between the table and one side of the pulley and check if any light can be seen at the opposite side. Check the pulley for cracks, fissures or dull rubber. If you know ahead of time that you're going to go all the way through with the job then it will help to break loose the Crankshaft Pulley Bolt before removing the engine mount.
Install the pulley puller on the pulley and insert the puller pin into the bolt hole.
Get to work!
Remove the Timing Chain Cover
The hardest part here is removing the torx bolt due to its location. Use a size 45mm torx wrench and let the bolt soak in some penetrating oil. You may want to replace the torx bolt with a regular bolt or fasten it back somewhere where it's easier to remove in the future (at the bottom of the pan).
With the torx bolt out, remove the rest of the timing chain cover bolts bottom-to-top. You need a 15mm socket to remove the top bolt.
Remove the timing cover.
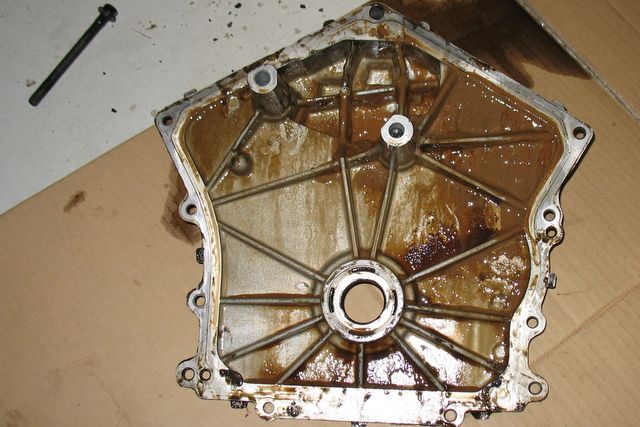
Inspect the Timing Chain
Inspect the Timing Chain and the Front of the Engine.
Insert back the crankshaft bolt and turn the crankshaft clockwise a few times and inspect the chain, guides, tensioner and sprockets. This will pump more coolant out of the engine, keep a pan handy. To proceed to the next step align the timing marks. If you don't want to continue then put the timing cover and engine mount back and get it towed to a body shop.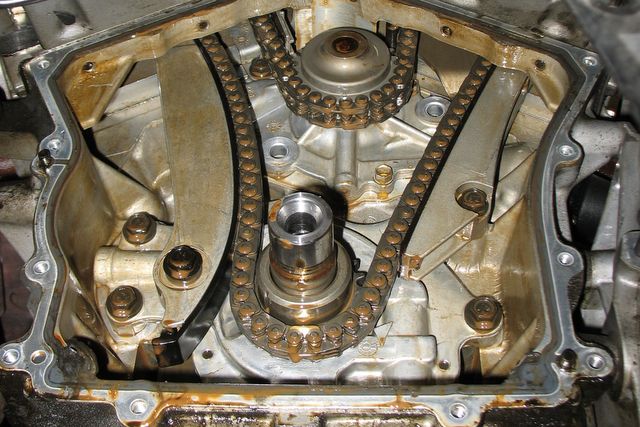
<< First [Prev] [Next] Last >> 1 ..2.. 3 4